Find the Best Mini-Split Installers for Your Business
No obligation • Fast responses • Nationwide coverage
Why you can trust HVAC Firms
HVAC Firms is a leading United States resource for evaluating HVAC service providers. Our team researches companies, checks credentials, and reviews customer feedback to present clear, unbiased information. Listings and rankings are based on merit, and companies cannot pay to change our editorial content.
Search providers near you
Top Mini-Split Installers in Ontario, California Ranked
Installing a ductless mini-split system is a smart solution for achieving zoned comfort in your Ontario home. These versatile systems provide efficient heating and cooling without the need for extensive ductwork, making them ideal for room additions, converted spaces, or homes that lack existing ducts. This guide will help you understand the key considerations, from planning and placement to costs, so you can make an informed decision when connecting with local professionals for your project.

Air Care
30211 Avenida de las Banderas #200, Rancho Santa Margarita, CA 92688
Air Care is a veteran-owned heating and air conditioning company based in Long Beach, CA. They provide residential HVAC services including air conditioning repair, furnace repair, mini split installation, HVAC tune-ups, and indoor air quality solutions. Serving Long Beach and the surrounding Orange County areas, Air Care offers 24/7 emergency services to address heating and cooling issues promptly. Their technicians are licensed, trained, and certified, ensuring professional and reliable workmanship. The company emphasizes quality and integrity in all their services and partners with top brands like Trane to deliver high-quality products.
Sano Heating & Air Conditioning
5546 E La Palma Ave, Anaheim, CA 92807
Sano Heating & Air Conditioning is an HVAC company based in Anaheim, CA, providing a range of heating and cooling services. They offer repair and installation for air conditioners, furnaces, heat pumps, mini splits, and perform HVAC tune-ups. The company also specializes in indoor air quality solutions and energy-efficient options like ductless and zoned systems. Serving Anaheim and the surrounding Orange County area, they handle new construction projects and have sheet metal capabilities to support their HVAC services.

Comfort Time Plumbing Heating & Cooling
8038 Freestone Ave, Santa Fe Springs, CA 90670
Comfort Time Plumbing Heating & Cooling is a family-owned company based in Los Angeles, CA, providing comprehensive HVAC and plumbing services for homes and businesses. They specialize in the repair and installation of air conditioning, furnaces, heat pumps, boilers, mini splits, and commercial refrigeration systems. Comfort Time Plumbing Heating & Cooling offers same-day service and uses advanced techniques such as trenchless sewer line replacement to address plumbing issues efficiently. Since 2008, they have served the local community with trained technicians who maintain up-to-date certifications and prioritize respect for customers' homes.

Hush Air Heating & Air Conditioning
21790 Van Buren Boulevard Ste 104, Riverside, CA 92518
Hush Air Heating & Air Conditioning is a full-service HVAC company based in Riverside, CA. They offer a range of services including air conditioning and heat pump repair, installation of central AC systems, ductless mini splits, and heat pumps. The company also provides indoor air quality evaluations and installs whole-house air filtration and purification systems to improve home environments. Additionally, they service tankless water heaters and offer routine HVAC maintenance to ensure system efficiency and reliability.
Haven Air Conditioning
1450 N Lakeview Ave, Anaheim, CA 92807
Haven Air Conditioning is an HVAC company based in Anaheim, CA, offering a range of services including air conditioning, furnace, heat pump, and mini split installation and repair. They also provide HVAC tune-ups, duct cleaning, and thermostat installation. The company is experienced in handling complex HVAC systems and offers detailed inspections and maintenance advice to improve system efficiency. Customers appreciate their thoroughness and clear communication throughout the service process. Haven Air Conditioning has built a reputation for professional installations and repairs in the Anaheim area.
Understanding Ductless Mini-Split Systems
A ductless mini-split, often simply called a ductless system, consists of an outdoor compressor/condenser unit connected by refrigerant lines to one or more indoor air-handling units. This setup allows for targeted climate control in specific zones of your home. For residents in Ontario, where temperatures can soar in the summer, this technology offers a flexible and energy-efficient alternative to traditional central air, especially in areas where extending ductwork is impractical or prohibitively expensive.
The primary appeal is zoned comfort. Instead of cooling or heating your entire house, you can focus energy on the rooms you use most. This is perfect for managing hot or cold spots, like a sun-drenched home office or a chilly basement bedroom. By installing a ductless air conditioner and heater, you gain independent control over each indoor unit, which can lead to significant energy savings over time.
Ideal Applications for Mini-Splits in Ontario Homes
Ductless installation shines in specific scenarios common to the Ontario area. If you're considering a system, it's likely for one of these key applications:
- New Additions or Conversions: Adding climate control to a converted garage, finished attic, sunroom, or basement is a top reason to choose a mini-split. Running new ducts to these spaces can be structurally challenging and costly. A ductless system provides a dedicated, efficient solution without the need to tear into walls or ceilings to extend your existing HVAC infrastructure 1.
- Room-by-Room Zoning: Do you have a bedroom that's always too warm or a living room that never seems cool enough? Installing a mini-split in that specific room allows you to address the comfort issue directly without affecting the rest of your home's temperature settings.
- Homes Without Ductwork: Many older homes in and around Ontario were built without central air conditioning ducts. Installing a central forced-air system in these homes can be a massive, disruptive renovation. A ductless mini-split system offers a far less invasive path to whole-home comfort, often requiring only small holes for the refrigerant lines.
System Types: Single-Zone vs. Multi-Zone
When planning your ductless air conditioner installation, one of the first decisions is choosing between a single-zone or multi-zone configuration.
- Single-Zone Systems: This setup involves one outdoor unit connected to a single indoor unit. It's the most straightforward and cost-effective option, perfect for conditioning one specific room, such as a master bedroom suite, home office, or garage workshop.
- Multi-Zone Systems: A single outdoor compressor can be connected to multiple indoor units (typically from 2 to 8). This allows you to control the temperature in several rooms or zones independently from one another. For example, you could cool the living room and kitchen while keeping the bedrooms warmer, all from one outdoor unit. This is an excellent solution for whole-home comfort in a ductless property or for adding climate control to multiple new additions.
Planning Your Installation: Indoor Unit Placement
Proper placement of the indoor air handler is crucial for performance, efficiency, and comfort. Incorrect placement can lead to poor airflow, uneven temperatures, and even moisture issues. Here are the key guidelines for Ontario installations:
- High on a Wall: The most common and generally recommended location is high on an interior wall. This allows for the best circulation of conditioned air across the room. The unit should be mounted in a central location, away from corners, to prevent short-cycling air and to ensure even distribution.
- Unobstructed Airflow: The unit must have clear space in front of it. Avoid placing it behind furniture, curtains, or in areas with direct sunlight from a window, as this can trick the temperature sensor. Also, keep it away from other heat sources or drafty areas like doors 2.
- Level Mounting: The unit must be installed perfectly level according to the manufacturer's specifications. This is not just for aesthetics; a level installation ensures proper drainage of condensation that forms during the cooling process. Improper leveling can lead to water leaks and potential damage to your wall or floor.
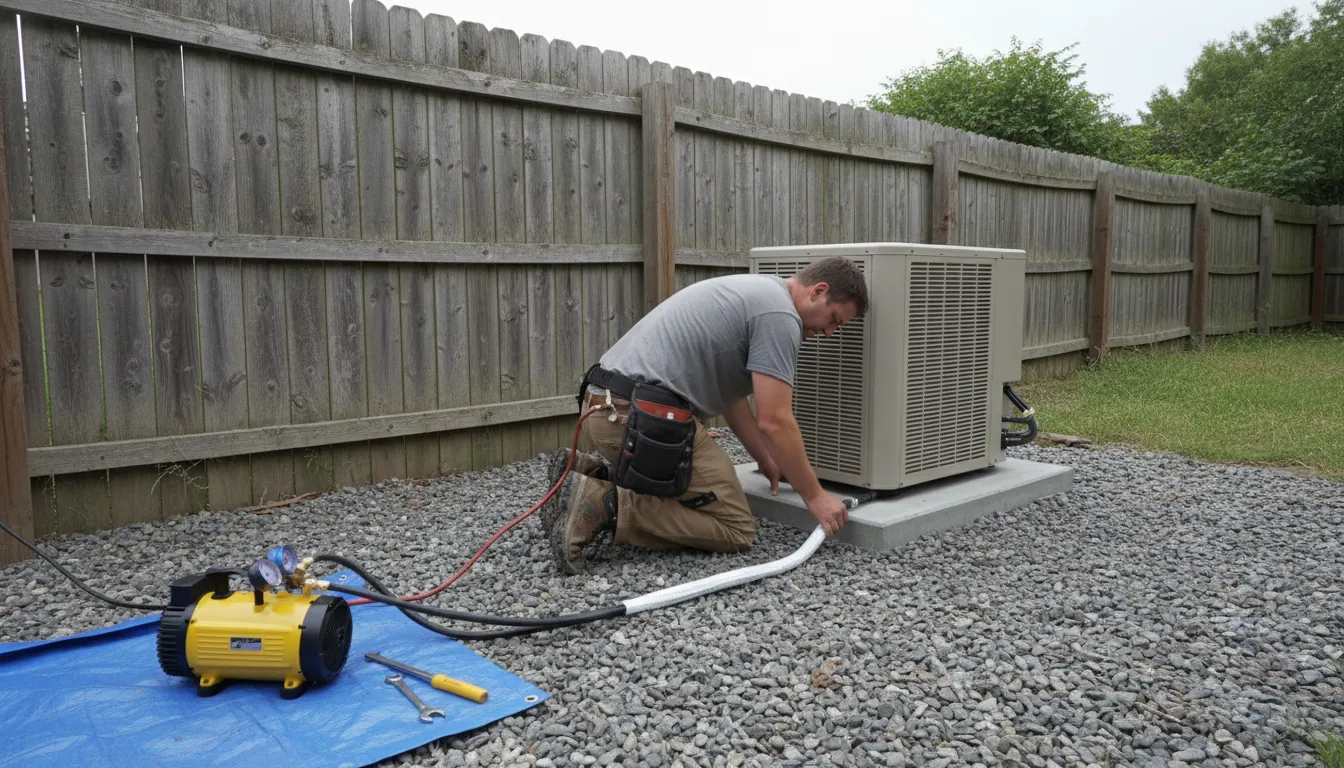
Outdoor Unit Placement Considerations
The location of the outdoor condenser is equally important for system longevity and efficiency, especially given Ontario's climate.
- Choose a Shaded Spot: Whenever possible, place the outdoor unit in a shaded area. Direct, prolonged sunlight increases the ambient temperature around the unit, forcing it to work harder to reject heat, which reduces efficiency and can shorten its lifespan. In Ontario's hot summers, shade can provide a measurable boost to performance.
- Ensure Ample Clearance: The unit needs space to breathe. Professional installers recommend at least 12 to 24 inches of clearance on all sides from walls, fences, shrubs, or other obstructions. This allows for adequate airflow across the condenser coils, which is essential for heat transfer. Blocked airflow is a common cause of system failure and reduced cooling capacity 3.
- Provide a Stable Foundation: The condenser should be placed on a stable, level surface. This is typically a concrete pad or a dedicated composite mounting platform. Elevating it slightly off the ground (on the pad or platform) helps keep it free from dirt, leaves, and lawn debris, and prevents potential flood damage 4.
Find the perfect mini-split installers for your needs
Get personalized recommendations and expert advice
Understanding Installation Costs in Ontario
The cost for a mini-split installation in Ontario can vary widely based on the scope and complexity of the project. It's an investment that includes equipment, labor, and any necessary ancillary work.
- Single-Zone System: For a basic one-room system, homeowners can expect a total installed cost ranging from $2,000 to $5,000. This includes the indoor and outdoor units, refrigerant lines, electrical connections, and standard labor 5 6.
- Multi-Zone System: Installing a system with multiple indoor zones (e.g., 3-5 zones for a whole-home setup) is a larger project. Costs typically range from $8,000 to $25,000 or more. The final price depends heavily on the number of zones, the total cooling capacity (BTUs), the efficiency rating (SEER) of the equipment, and the complexity of running lines to various parts of the home 7 8.
- Key Cost Factors: Several variables influence the final quote:
- Equipment: Higher-efficiency (SEER) units and brands with advanced features cost more.
- Labor Complexity: Installations that require long refrigerant line runs, through attics or crawl spaces, or dealing with challenging wall constructions will increase labor time and cost.
- Additional Work: Many installations require a dedicated electrical circuit. The cost for an electrician to run this circuit can add $500 to $2,000. If drywall repair or patching is needed after running lines, this will be an additional expense 9 10.
While the upfront cost can be significant, it's important to consider the operational savings. Ductless systems are highly efficient, and their zoned operation means you're not wasting energy conditioning empty rooms. Over time, these energy savings can help offset the initial investment in your ductless heat pump installation.
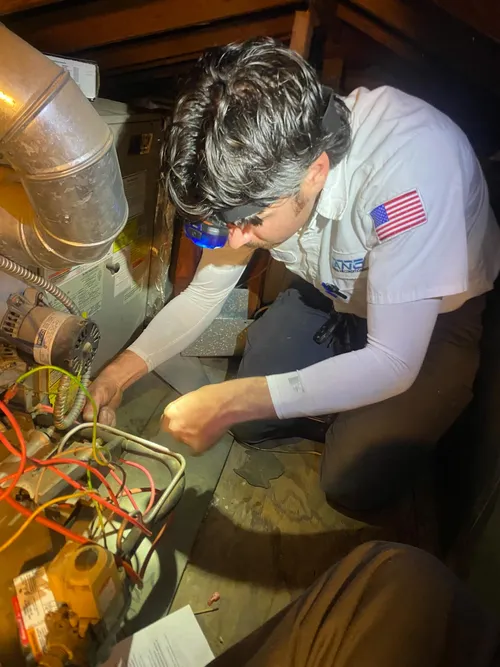
The Professional Installation Process
A proper ductless mini-split installation is not a DIY project. It requires HVAC expertise, specialized tools, and certification for handling refrigerant. A professional installation typically follows these steps:
- Site Evaluation and Load Calculation: A technician will assess your home, discuss your comfort goals, and perform a load calculation to determine the correct size (in BTUs) needed for each zone. Oversizing or undersizing a system leads to inefficiency and comfort problems.
- Planning and Permitting: The installer will plan the routing for refrigerant lines, drain lines, and electrical wiring. They will also typically pull any required local building permits.
- Mounting the Units: The indoor wall units are securely mounted, and the outdoor condenser is placed on its stable pad or platform.
- Running Linesets: Small holes (about 3 inches) are drilled to pass the insulated refrigerant lines and condensate drain line from the outdoor unit to each indoor unit. These lines are run through walls, often in attics or crawl spaces.
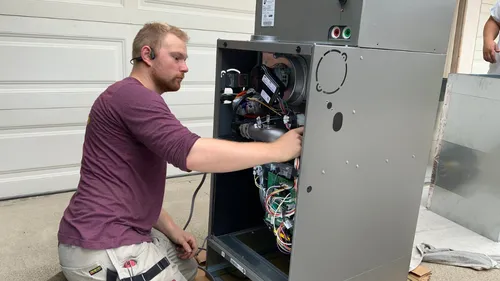
- Electrical Connections: A licensed electrician or the HVAC team will connect the outdoor unit to a new dedicated electrical circuit from your main panel.
- System Evacuation and Charging: This is a critical step. The system is vacuumed of all air and moisture before the precise amount of refrigerant is charged. This ensures peak efficiency and longevity.
- Testing and Commissioning: The system is started, and all functions (cooling, heating, fan speeds, thermostat controls) are tested. The installer will also review the operation and maintenance with the homeowner.
Frequently asked questions
Sources
Footnotes
-
Ductless & Mini Split System Services in Ontario, CA - https://www.powerproplumbing.com/ductless/ductless-mini-split-systems-ontario-ca ↩
-
Mini Split Installation Guide | Process, Costs & Benefits - Bryant - https://www.bryant.com/en/us/products/ductless-systems/mini-split-installation/ ↩
-
Best Mini Split AC Installation Location - Carrier - https://www.carrier.com/residential/en/us/products/ductless-mini-splits/install-ductless-ac/best-mini-split-placement/ ↩
-
Ductless Mini Split Setup: An Ultimate Guide - Airflow Heating & Air - https://www.goairflow.com/blog/ductless-mini-split-installation/ ↩
-
Ductless Mini-Split Installation Cost in 2025: Full Breakdown - https://osborneheatingncooling.com/ductless-mini-split-installation-cost/ ↩
-
Mini-Split AC Installation in California - Bonney: Plumbing - https://www.bonney.com/blog/mini-split-ac-cost-california/ ↩
-
How Much Does a Mini-Split Cost in 2025? - EnergySage - https://www.energysage.com/heat-pumps/how-much-does-a-mini-split-cost/ ↩
-
Ductless Mini Split Installation Costs in 2026 - Carrier - https://www.carrier.com/residential/en/us/products/ductless-mini-splits/ductless-mini-split-installation-cost/ ↩
-
How Much Does a Mini-Split Installation Cost? - Taskrabbit Blog - https://www.taskrabbit.com/blog/mini-split-installation-cost/ ↩
-
Mini Split Installation Cost in 2024 - Alpine Home Air - https://www.alpinehomeair.com/learning-center/ductless-mini-split-systems/cost-to-install-mini-split ↩