Find the Best Mini-Split Installers for Your Business
No obligation • Fast responses • Nationwide coverage
Why you can trust HVAC Firms
HVAC Firms is a leading United States resource for evaluating HVAC service providers. Our team researches companies, checks credentials, and reviews customer feedback to present clear, unbiased information. Listings and rankings are based on merit, and companies cannot pay to change our editorial content.
Search providers near you
Top Mini-Split Installers in Ceres, California Ranked
Ductless mini-split installation provides an efficient, flexible solution for heating and cooling homes and businesses in Ceres. These systems offer zoned comfort control, allowing you to adjust temperatures in individual rooms or areas, which can lead to significant energy savings compared to traditional central HVAC. This guide will help you understand the process, applications, and considerations for installing a ductless mini-split system, connecting you with the information needed to find qualified local professionals for your project.

Wally Falke's Heating & Air Conditioning
1575 Lander Ave, Turlock, CA 95380
Wally Falke's Heating & Air Conditioning provides heating, ventilation, and air conditioning services in San Jose, CA. Serving the Greater Modesto Metro Area and surrounding Central Valley communities, they offer air conditioning and furnace repair, installation, maintenance, and indoor air quality services. The company specializes in HVAC system tune-ups, ductwork, insulation, and energy optimization, including ductless mini split installations. Established in 1969, Wally Falke's has over 50 years of experience delivering HVAC solutions. Their services are available 24/7 to ensure continuous home comfort.
Cam's Heating & Air
5300 Claus Rd Bldg 34a, Riverbank, CA 95367
Cam's Heating & Air provides HVAC installation, repair, and maintenance services in Stockton, CA. They handle a variety of systems including air conditioners, furnaces, heat pumps, boilers, mini splits, and geothermal heat pumps. Their services focus on ensuring efficient performance and lasting comfort through expert installations and regular tune-ups.

Baker's Heating and Air Conditioning
902 N Central Ave Suite 220, Tracy, CA 95376
Baker's Heating and Air Conditioning is a family-owned HVAC contractor serving Stockton, CA, and the surrounding San Joaquin County communities. Established in 1975, they offer a wide range of services including air conditioning and furnace repair, installation, and maintenance, as well as heat pump and mini-split system installations. Their factory-trained technicians provide same-day emergency repairs and comprehensive tune-ups to help maintain system efficiency and longevity. The company also specializes in indoor air quality solutions such as whole-home air purifiers and advanced filtration systems. Baker's Heating and Air Conditioning is licensed, insured, and offers 24/7 emergency HVAC service to address urgent heating and cooling needs.
Irish Heating and Air Conditioning
672 W 11th St #351, Tracy, CA 95376
Irish Heating and Air Conditioning is a heating and cooling contractor serving Stockton, CA, and the surrounding Central Valley area. They provide a wide range of HVAC services including air conditioning repair and installation, furnace and boiler services, ductless mini-split systems, thermostat installation, and indoor air quality solutions. The company installs equipment from leading manufacturers and offers commercial HVAC system design and maintenance. Irish Heating and Air Conditioning also specializes in whole house air purifier installations and home generator services. Their technicians are NATE and EPA certified, licensed, insured, and background-checked. The company operates seven days a week and supports customers with a 1-year parts and labor warranty on repairs and up to 10 years on new installations.
Understanding Ductless Mini-Split Systems
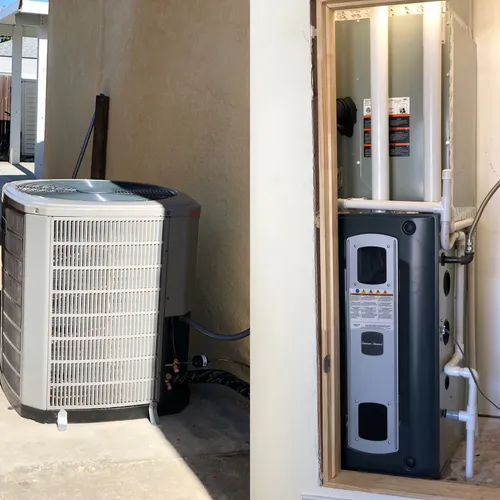
A ductless mini-split system is a type of heat pump that provides both heating and cooling without the need for extensive ductwork. The system consists of two main components: a quiet outdoor condenser/compressor unit and one or more indoor air-handling units. These are connected by a small conduit that houses refrigerant lines, power cables, and a condensate drain, which is run through a small hole in your wall 1. This design makes ductless systems an excellent choice for room additions, homes without existing ducts, or for targeting specific areas where your central system underperforms.
The core appeal of a ductless air conditioner installation is its zoning capability. Unlike a single thermostat controlling the whole house, each indoor unit can be controlled independently. This means you can cool your home office during the day without wasting energy cooling empty bedrooms, or provide supplemental heat to a sunroom that gets chilly in the evening. This precise control is a key driver of the energy efficiency that mini-splits are known for.
Common Applications in Ceres Homes
Choosing the right system configuration depends entirely on your goals. Local installers often categorize projects into three main types:
- Single-Zone Systems: This is the most straightforward setup, perfect for conditioning one specific space. It's ideal for a garage conversion, a new bedroom addition, a sunroom, or a standalone studio apartment. A single-zone system addresses a specific comfort problem without modifying your home's existing HVAC.
- Multi-Zone Systems: If you need to cool or heat multiple distinct areas, a multi-zone ductless installation is the answer. One outdoor unit can connect to two, three, four, or even more indoor units. You could have one in the kitchen, one in the master bedroom, and one in a living area, each with its own remote control. This is a popular solution for older homes in Ceres where extending ductwork is impractical or too costly 2 3.
- Whole-Home Solutions: For comprehensive coverage, larger-capacity multi-zone systems can be designed to condition an entire house. They can serve as a complete replacement for an old central air system or work in tandem with it to handle areas that are difficult to reach with ducts. This approach offers whole-house comfort with the added benefit of individual room control 4.
Planning Your Installation: Indoor Unit Placement
Where you place the indoor air handlers is critical for both performance and comfort. The most common type is the high-wall mount, which is installed high on an interior wall for optimal air distribution across the room. When planning this placement, technicians look for a location with unobstructed airflow-away from corners, large furniture, or anything that could block the path of conditioned air. The goal is to allow the air to sweep across the room effectively.
Other indoor unit styles offer solutions for unique room layouts. Floor-mounted units are a good option for rooms with low walls or extensive window coverage. Ceiling cassette models are recessed into the ceiling, offering a very discreet appearance, while ceiling-mounted units are surface-mounted. The choice often comes down to your room's architecture and aesthetic preferences 5. All styles require a nearby exterior wall for the line-set connection.
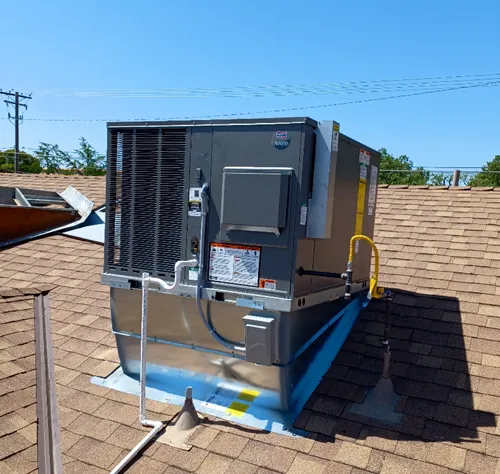
Planning Your Installation: Outdoor Unit Considerations
The outdoor condenser unit requires careful placement. It is typically installed on a stable, level concrete pad or mounted securely to the side of the house on a dedicated bracket 6. The location must provide adequate clearance (usually 1-2 feet) on all sides for proper airflow and future maintenance access. Technicians will also consider noise, placing the unit away from bedroom windows or neighboring property lines when possible.
The connection between the indoor and outdoor units is made via a "line set." This bundle contains copper refrigerant tubing, electrical wiring, and a drain line for condensation. A key part of the installation is drilling a small, clean hole (approximately 2-3 inches in diameter) through the exterior wall to pass this conduit. This hole is then meticulously sealed with PVC or silicone to maintain your home's weather and pest barrier.
Find the perfect mini-split installers for your needs
Get personalized recommendations and expert advice
What to Expect: The Professional Installation Process
A proper mini-split installation is a technical job that ensures system efficiency, reliability, and warranty validation. Here's a general overview of the steps a certified technician will follow:
- Site Preparation & Mounting: The technician will identify the optimal locations and securely mount the bracket for the indoor unit and the pad/bracket for the outdoor unit, ensuring everything is level and secure.
- Drilling & Line Set Run: A small hole is drilled through the exterior wall. The copper line set is carefully routed from the outdoor unit location, through the wall hole, and to the indoor unit mounting location 7.
- Electrical Connections: Power is run from your home's main electrical panel to the outdoor unit. The low-voltage communication wires connecting the indoor and outdoor units are also terminated.
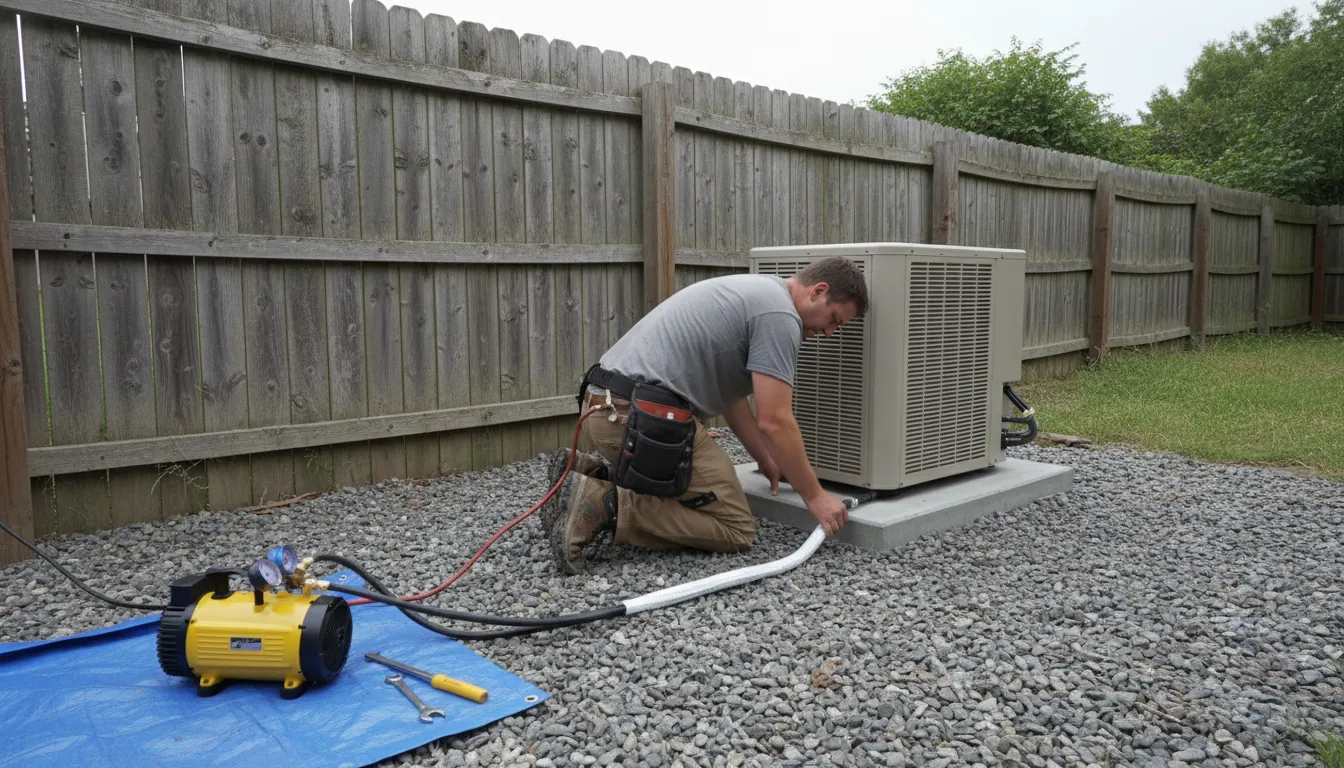
- Making Connections & Charging: The refrigerant lines are flared, connected, and tightened to the units. A vacuum pump is then used to remove all air and moisture from the refrigerant lines-a critical step for system longevity and performance. Finally, the system is charged with the correct amount of refrigerant.
- System Testing & Demonstration: The technician will power on the system, test all modes (heating and cooling), check for proper drainage, and verify there are no refrigerant leaks. Once confirmed, they will demonstrate how to use the remote controls and explain basic maintenance 8 9.
Understanding Investment and Cost Factors
The cost of a ductless mini-split installation in Ceres varies based on the system's size, complexity, and the specific equipment chosen. Here is a general cost breakdown based on the number of zones 10 11 12:
- Single-Zone System: Typically ranges from $2,500 to $6,000.
- Two-Zone System: Often falls between $4,500 and $8,000.
- Three-Zone System: Can range from $6,500 to $11,000 or more.
Several key factors influence the final price:
- Equipment Capacity (BTUs): Larger units that cool bigger spaces cost more.
- Efficiency Rating (SEER): Higher-efficiency models with superior SEER ratings have a higher upfront cost but lower operating expenses.
- Labor Complexity: Installations requiring longer line-set runs, additional electrical work, or complex mounting will increase labor time and cost.
- Indoor Unit Style: Ceiling cassettes or floor units may cost more than standard high-wall models due to more involved installation.
- Permits: Local building permits may be required and are an additional cost factor 13.
Investing in a professional installation is non-negotiable. Proper installation directly impacts the system's efficiency, lifespan, and your ability to claim the manufacturer's warranty. A correctly installed system will provide quiet, reliable, and cost-effective comfort for years to come.
Frequently asked questions
Sources
Footnotes
-
Ductless Mini Split Installation: A Complete Guide - https://www.goairflow.com/blog/ductless-mini-split-installation/ ↩
-
What is a 3 Zone Mini Split, and What is its Installation Cost? - https://www.acdirect.com/blog/what-is-a-3-zone-mini-split-and-what-is-its-installation-cost/ ↩
-
Ductless Mini Splits Ceres, CA | Norcal HVAC - https://www.norcalhvac.net/ductless-mini-splits ↩
-
How to Install a Mini Split - The Home Depot - https://www.homedepot.com/c/ah/how-to-install-a-mini-split/9ba683603be9fa5395fab90c887a9dd ↩
-
Best Place to Install a Ductless Mini Split System - https://jacobsheating.com/blog/mini-split-placement/ ↩
-
Installing a Mini-Split: 5 Things To Know BEFORE Installation | CE - https://www.carrierenterprise.com/hvac-news/installing-a-mini-split ↩
-
How to Install a Ductless Mini Split - https://www.youtube.com/watch?v=_9znmIendu8&t=130 ↩
-
Full Installation of Mini Split Ductless Unit, Step by Step! - https://www.youtube.com/watch?v=JQkth-AM5CE&t=156 ↩
-
Ductless mini-split installation: Cool 2025 Guide - Southern Air - https://www.southern-air.com/blog/ductless-mini-split-installation ↩
-
Ductless Mini-Split Installation Cost in 2025: Full Breakdown - https://osborneheatingncooling.com/ductless-mini-split-installation-cost/ ↩
-
Mini-Split AC Installation in California - Bonney: Plumbing - https://www.bonney.com/blog/mini-split-ac-cost-california/ ↩
-
What Is a 3-Zone Mini Split & Installation Cost Guide For 2026 - https://www.budgetheating.com/what-is-a-3-zone-mini-split-installation-cost-guid/ ↩
-
Understanding mini split installation costs: A quick guide - Homeaglow - https://www.homeaglow.com/hub/content/mini-split-installation-cost ↩