Find the Best Mini-Split Installers for Your Business
No obligation • Fast responses • Nationwide coverage
Why you can trust HVAC Firms
HVAC Firms is a leading United States resource for evaluating HVAC service providers. Our team researches companies, checks credentials, and reviews customer feedback to present clear, unbiased information. Listings and rankings are based on merit, and companies cannot pay to change our editorial content.
Search providers near you
Top Mini-Split Installers in St Paul, Minnesota Ranked
A ductless mini-split system is a versatile heating and cooling solution perfect for many St. Paul homes. Unlike traditional central air, these systems don't require bulky ductwork, making them ideal for older houses, room additions, or solving stubborn hot and cold spots. This guide will help you understand the process, benefits, and key considerations for installing a mini-split, so you can find the right local expertise for your project.

Hurlburt Heating & Plumbing
1000 County Rd E Suite 115, Shoreview, MN 55126
Hurlburt Heating & Plumbing is a family-owned home services provider serving Minneapolis, MN, and surrounding areas. Since 1959, they have offered a wide range of services including HVAC installation and repair, plumbing, and electrical work. Their HVAC services cover air conditioner and furnace repair, heat pump and mini split installation, indoor air quality solutions, and HVAC tune-ups. Hurlburt also provides whole-home air scrubbers, purifiers, humidifiers, and dehumidifiers to improve indoor air quality. With over six decades of experience, they combine modern technology with personalized service to address customer needs.

Nice Heating & Air
24 Onville Rd suite 101-9, Stafford, VA 22556
Nice Heating & Air is an HVAC company serving Minneapolis, MN, specializing in air conditioning, heating, and indoor air quality services. They provide installation, repair, and maintenance for systems including ductless mini splits, heat pumps, furnaces, and water heaters. The company has many years of experience and focuses on delivering high-quality products and services with a commitment to customer satisfaction. Their capabilities include HVAC tune-ups and indoor air quality improvements such as air purifier installation and ventilation services.

Furnace Doctors
102 County Rd C West, Little Canada, MN 55117
Furnace Doctors is an HVAC company based in Minneapolis, MN, offering a range of heating and cooling services. Their expertise includes furnace repair and replacement, air conditioner repair and installation, ductless system installation, and indoor air quality solutions such as air filtration and humidity control systems. The company emphasizes maximizing HVAC system performance and has installers with over 25 years of experience. Furnace Doctors also provides annual maintenance plans to help keep systems running efficiently.

Pronto Heating and Air Conditioning - Minneapolis
7415 Cahill Rd, Minneapolis, MN 55439
Pronto Heating and Air Conditioning - Minneapolis is an HVAC company serving Minneapolis, MN, and nearby communities. They provide installation, repair, and maintenance for heating and cooling systems including furnaces, air conditioners, boilers, heat pumps, and ductless mini splits. The company is a Bryant Factory Authorized Dealer with expertise in indoor air quality solutions such as air purification and advanced thermostats. Pronto Heating and Air Conditioning offers emergency service with a commitment to respond within 24 hours and has a history of recognized performance as a multiple Bryant Dealer of the Year finalist and winner.
Stafford Home Service
6225 Cambridge St, Minneapolis, MN 55416
Stafford Home Service is a family-operated company based in Minneapolis, MN, offering residential HVAC and electrical services. They provide repairs, installations, and maintenance for heating and cooling systems including furnaces, heat pumps, boilers, mini-split systems, and air conditioning units. The company features licensed technicians with over 70 years of combined experience and emphasizes transparent pricing and customer satisfaction. Stafford Home Service also offers advanced HVAC solutions with Daikin products, known for energy efficiency and zoning capabilities. Since 2007, the company has continued a legacy of quality workmanship under current ownership. They serve Minneapolis and surrounding communities with a range of home comfort services.
What is a Ductless Mini-Split System?
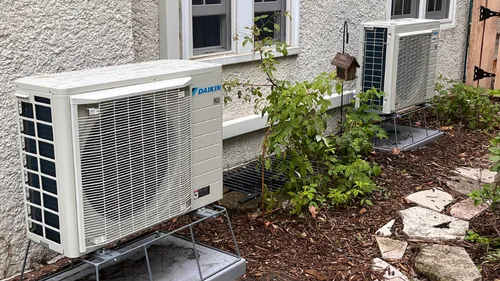
A ductless mini-split, often simply called a ductless system, consists of two main components: a quiet outdoor condenser unit and one or more sleek indoor air handlers. These are connected by a small conduit that houses refrigerant lines, electrical wiring, and a condensate drain. This setup allows for targeted, or "zoned," climate control in specific areas of your home without the energy losses associated with ductwork.
The indoor units are typically mounted high on a wall or on the ceiling to promote optimal air distribution. Because they operate independently, you can heat or cool only the rooms you're using, which is a significant advantage for energy efficiency and personalized comfort in St. Paul's variable climate.
Common Reasons St. Paul Homeowners Choose Mini-Splits
Ductless installations solve specific challenges common in the Twin Cities area.
- Homes Without Existing Ductwork: Many beautiful, historic St. Paul homes were built without central air ducts. A ductless mini-split provides a whole-home or supplemental climate control solution without the massive renovation and loss of space required to install ducts.
- Room Additions and Finished Spaces: Adding conditioned space to a sunroom, garage conversion, or attic is straightforward with a mini-split. It's often more cost-effective and efficient than extending your existing duct system.
- Solving Hot and Cold Spots: If your central system struggles to keep certain rooms comfortable, a single-zone mini-split can target that problem area directly, balancing your home's temperature without overcooling or overheating the rest of the house 1.
- Efficiency and Zoning: For families with different schedule or temperature preferences, the zoning capability of a multi-zone system is a game-changer. Bedrooms, living areas, and home offices can all be set to different temperatures, eliminating thermostat battles and reducing energy waste.
Understanding System Types: Single-Zone vs. Multi-Zone
Choosing between a single-zone and multi-zone system is one of the first decisions you'll make.
- Single-Zone Systems: This configuration involves one outdoor condenser connected to one indoor air handler. It's perfect for conditioning a single space, such as a new addition, a garage workshop, or that one problematic room. It's typically the most straightforward and budget-friendly installation option.
- Multi-Zone Systems: A single outdoor unit can connect to multiple indoor air handlers (commonly 2 to 5+). This allows you to independently control the temperature in several rooms or zones from one efficient system. Multi-zone installations are excellent for whole-home comfort in a ductless property or for adding comprehensive climate control to a larger addition or finished basement.
The choice depends on your home's layout, your comfort goals, and your budget. A professional can assess your space and recommend the most effective configuration.
Key Installation Considerations for St. Paul Homes
Proper installation is critical to the performance, efficiency, and longevity of your mini-split system. Key factors include:
- Indoor Unit Placement: Wall-mounted units should be installed high on the wall, typically 6-8 inches from the ceiling, to allow for proper air throw. They require clearance on all sides for airflow and future servicing. Ceiling cassette units are a flush-mount alternative that distributes air in four directions.
- Outdoor Unit Placement: The condenser must be placed on a stable, level pad (often concrete) with ample clearance-usually 1-2 feet on all sides and several feet above-to ensure unobstructed air circulation for heat exchange. In St. Paul, considering snow accumulation and accessibility for winter service is also important 2.
- Electrical Requirements: Mini-splits require a dedicated electrical circuit. The complexity can range from connecting to an existing outlet for smaller systems to running new conduit and installing a new breaker for larger, multi-zone setups.
- Line Set Routing: The conduit containing refrigerant lines must be run from the outdoor unit to each indoor handler. This often involves drilling a small hole (about 3 inches) through the exterior wall. A clean, sealed, and properly insulated installation prevents air leaks and ensures efficiency.
Find the perfect mini-split installers for your needs
Get personalized recommendations and expert advice
The Professional Installation Process
While DIY videos exist, professional installation is strongly recommended to ensure safety, efficiency, and warranty validity. The process generally follows these steps:
- Consultation and Load Calculation: A technician will assess your home's insulation, layout, and size to determine the correct system capacity (measured in BTUs). An oversized or undersized system will perform poorly.
- Planning and Permitting: The installer will plan the optimal locations for all components and handle any necessary local building permits, which often include electrical work.
- Mounting and Preparation: The indoor air handler brackets and outdoor condenser pad are securely mounted. The small hole for the line set is drilled through the wall.
- Electrical Connection: The dedicated circuit is connected to the outdoor unit, and wiring is run to the indoor unit(s).
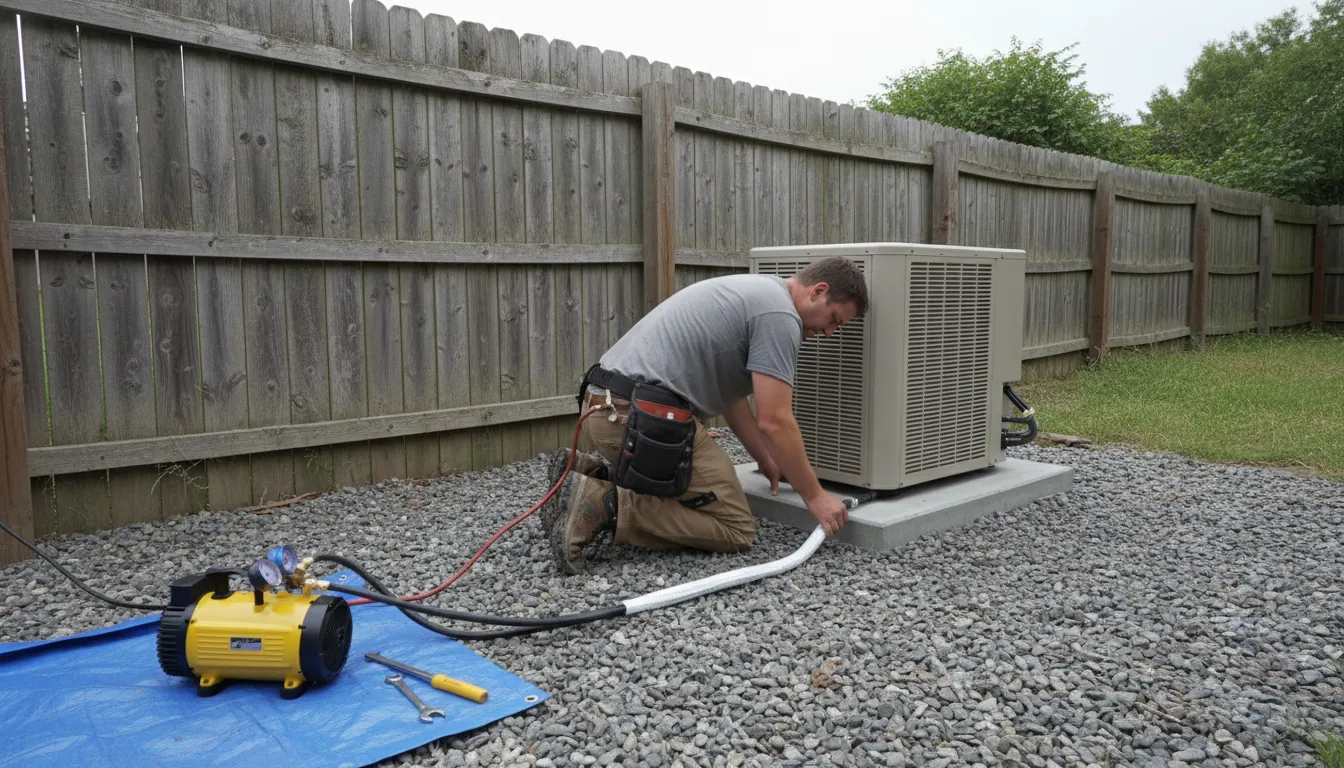
- Line Set Connection: The refrigerant lines are carefully connected between the indoor and outdoor units. This is a precise task requiring specialized tools to ensure a leak-free, vacuum-tight seal.
- System Evacuation and Charging: The refrigerant lines are evacuated of all air and moisture before the system is charged with refrigerant, a critical step for performance and longevity 3.
- Testing and Demonstration: The system is powered on and tested in both heating and cooling modes. The installer will show you how to use the remote controls and explain basic maintenance.
Cost Factors and Potential Rebates in Minnesota
The total cost of a mini-split installation in St. Paul varies based on several factors:
- Number of Zones: Adding more indoor units increases cost.
- System Capacity and Efficiency: Higher BTU capacity and higher SEER2 (Seasonal Energy Efficiency Ratio) ratings for cooling and HSPF (Heating Seasonal Performance Factor) for heating typically cost more but save on energy bills.
- Brand and Features: Different manufacturers offer varying levels of quality, noise, and smart features.
- Installation Complexity: The difficulty of running line sets through walls, floors, or attics and the extent of needed electrical work impact labor costs.
General cost ranges for a complete professional installation are:
- Single-Zone System: $3,000 - $8,000 4 5.
- Multi-Zone System (2-3 zones): $5,500 - $15,000 or more 6 7.
Financial Incentives: Minnesota homeowners should investigate available rebates. Utility companies like CenterPoint Energy often offer incentives for installing ENERGY STAR® certified high-efficiency ductless heat pumps, which can significantly offset the initial investment 8 9. Always ask your installer about current rebate programs.
Maintaining Your Ductless System
To keep your system running efficiently for years, simple maintenance is key. Homeowners should clean the reusable filters in the indoor air handlers monthly during peak seasons. This prevents dust buildup that can restrict airflow and reduce efficiency. Annually, it's wise to have a professional technician perform a more thorough check, which includes cleaning the indoor coils and outdoor condenser fins, checking refrigerant levels, and ensuring all electrical connections are tight 10. Proper care protects your investment and maintains your home's comfort.
Frequently asked questions
Sources
Footnotes
-
Ductless mini split installation ramsey, mn: Top Comfort 2025 - https://www.staffordhomeservice.com/blog/ductless-mini-split-installation-ramsey-mn ↩
-
Is a Ductless Mini-Split Installation a DIY Project A Complete Guide - https://www.heating-ac.com/blog/is-a-ductless-mini-split-installation-a-diy-project-a-complete-guide ↩
-
Installing a Mini-Split System | Finken - https://finkens.com/blog/installing-a-mini-split-system ↩
-
Mini Split Installation To Fix Zoning Issues In St. Paul - https://www.luxmechanical.com/cooling/mini-split-installation ↩
-
Mini Split System Average Cost in Minnesota (2025 Update) - https://genzryan.com/blog/mini-split-system-cost/ ↩
-
Ductless Mini-Split Installation Cost in 2025: Full Breakdown - https://osborneheatingncooling.com/ductless-mini-split-installation-cost/ ↩
-
Ductless Mini-Split Installation Costs in Minnesota - AIR COMFORT HEATING & AIR - https://www.aircomfortmn.com/blog/ductless-mini-split-installation-costs-in-minnesota ↩
-
Ductless mini splits - Heating & Cooling - CenterPoint Energy - https://www.centerpointenergy.com/en-us/residential/services/home-service-plus/products/heating-cooling/ductless-air-conditioners?sa=mn ↩
-
DIY MULTI-ZONE Ductless MINI SPLIT Installation in New ... - https://www.youtube.com/watch?v=KD2GM0fg8eU&t=18 ↩
-
Minnesota Ductless Mini-Split Installation & Maintenance | Finken HVAC - https://finkens.com/heating-and-cooling/ductless-minisplit ↩